1988 420SEL W126 Interior Wood Refinishing Project
#1
 02-12-2008, 09:30 PM


[align=left]Irecently purchaseda 1988 420SEL which has cracked andpoor lookingzebrano wood throughout the interior. New replacement wood is hard to find, and expensive if you do.I have also found that professional restoration can be quite pricey (I was quoted $500.00 to strip and refinish), and therefore, I am going to attempt to restore the existing zebrano pieces myself. I will document all costs and approximate time required to complete each step as I progress, as well as provide a photo log here in this thread.[/align][align=left][/align][align=left]I) To begin, I removed the center console section (20-25 minutes):[/align][align=left]1) Removed the ashtray (Took out inside tray, unscrewed 2 screws holding frame body in, and slid out assembly. Note: I moved theshifter togain clearance to remove).[/align][align=left][/align][align=left]2) Removed the coin cup below the ashtray, by pulling up gently on the front while sliding toward the front of the car.[/align][align=left][/align][align=left]3) Released console wood panel by sliding forward and then pulling up gently AFTER plastic tabs cleared on the underside.[/align][align=left][/align][align=left]4) Unplugged electrical connections (CAREFULLY, to avoid damaging the underside plastic panel that the switches snap into) for window switches, window lock, mirror control, and stereo fader.[/align][align=left][/align][align=left]5) Removed the console wood.[/align][align=left][/align][align=left]6) One by one, removed each switch from the panel (prying GENTLY outward with a tiny jewelers flathead screwdriver on the tabs holding it in), and plugged them back into their electrical connection so that I could keep track of where they went. Thisseemed likea good time to clean all the gunk off and out of the switches, so I took advantage. I used a can of Staples 'multi-purpose antistatic cleaner' which I had on hand (normally used to clean my PC and components), spraying it on a rag and wiping each switch and housing.[/align][align=center][/align][align=center]CONSOLE WOOD SECTION, UPON REMOVAL:[/align][align=center]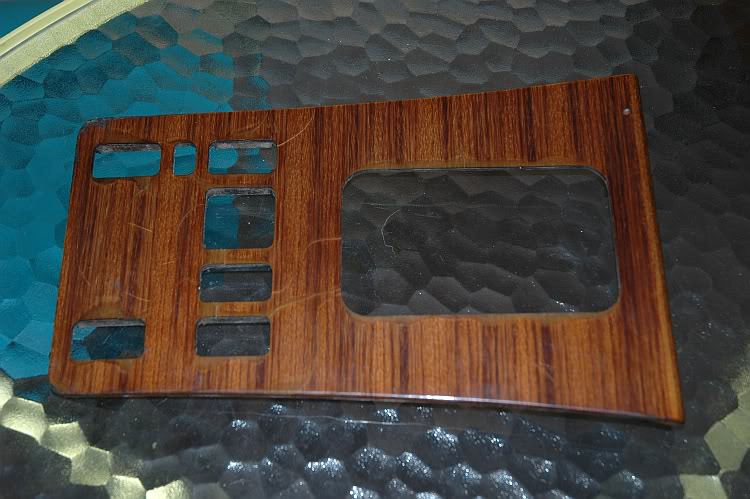 [/align][align=center][/align][align=center][/align][align=left]II) Prepped the panel prior to start of refinishing (10-15 minutes):[/align][align=left]After removing, I detached the plastic on the bottom of the panel which the switches all snap into, the two plastic tabs which hold the panel down, and the trim for the gear shift area. This is delicate work! The panel I am working on is 20 years old, and the plastic is somewhat brittle.[/align][align=left][/align][align=left]1) Removed the "plastic switch plate" by using two tiny jewelers flathead screwdrivers, and very delicately prying upunder the CENTER of each staple to slowly free it from the panel. Mine has several cracked areas (but seems to be complete and intact, whew!). I will epoxy this plate later where it has cracked to strengthen it for switch re-installation. I am hoping to re-install this piece later using the exsisting staples and staple holes as a guide, and using epoxy to attach it.[/align][align=left][/align][align=center]PLASTIC SWITCH PLATE, UPON REMOVAL:[/align][align=center]
 [/align][align=center][/align][align=center]
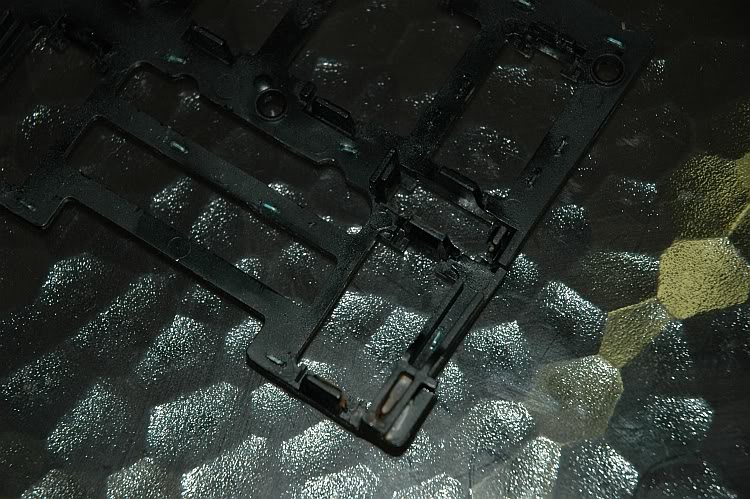 [/align][align=center][/align][align=left][/align][align=left]2) Removed the plastic tabs which hold the panel down in the car by lightly wiggling them and pulling gently. Again, I will be using the existing staples and staple holes to guide them back into position upon re-installation, using epoxy to attach them.[/align][align=left][/align][align=left]3) Removed the shifter area trim, by very lightly working at the edge (at as flat an angleas possible all along the underside edge of thetrim with a tiny jewelers flathead screwdriver), and very lightly prying up to free it. This was so brittle that a small piece broke off, and it is cracked and separating in places. I will have to either find anew one, orepoxy this one back together.[/align][align=left][/align][align=center]SHIFTER AREA TRIM, UPON REMOVAL:[/align][align=center]
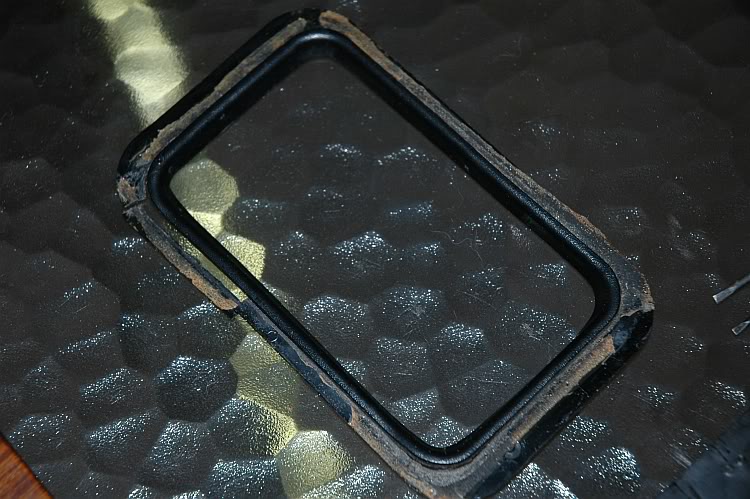 [/align][align=center][/align][align=center]CONSOLE PANEL, PREPPED FOR START OF REFINISHING:[/align][align=center]
 [/align][align=center][/align][align=center]
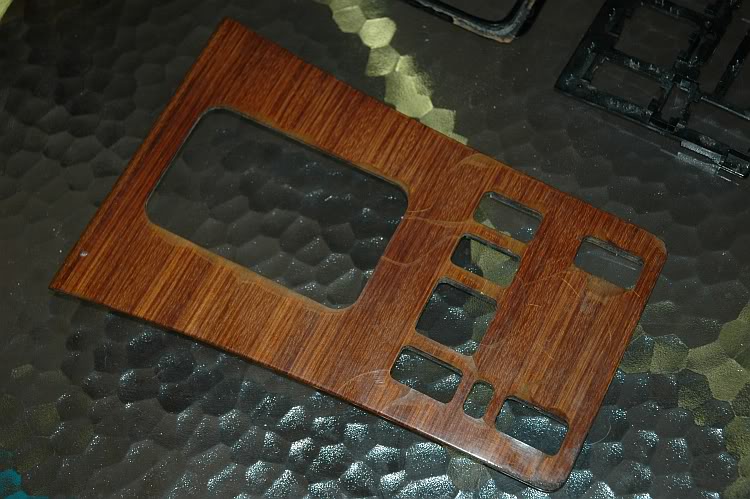 [/align][align=center][/align][align=center]
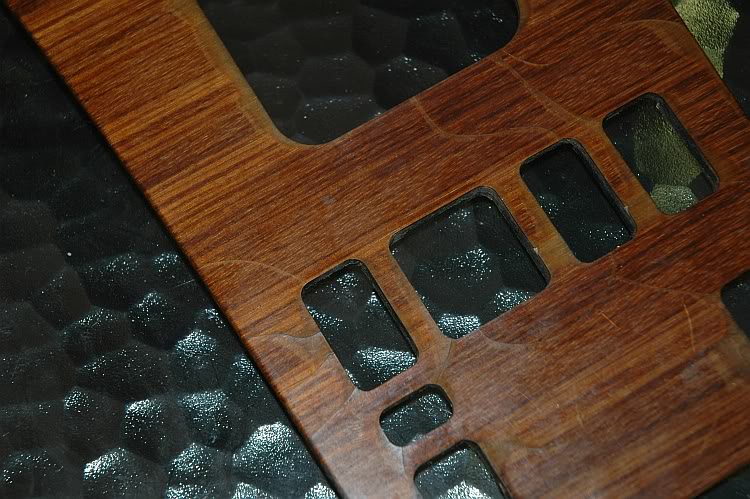 [/align][align=center][/align][align=center]
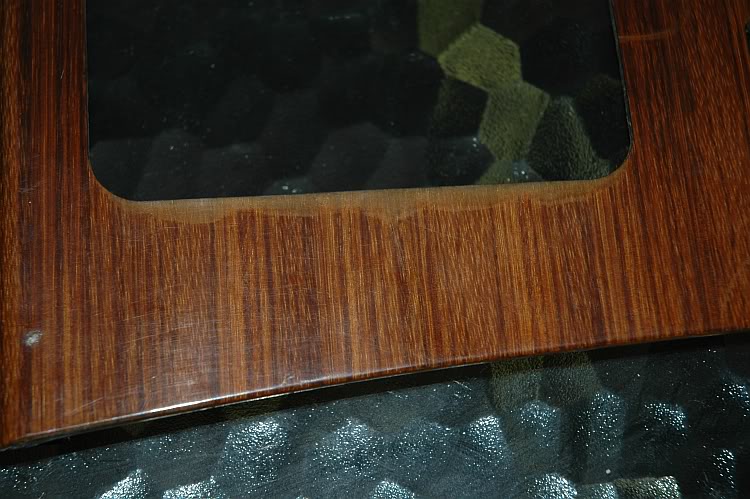 [/align][align=center][/align][align=center]
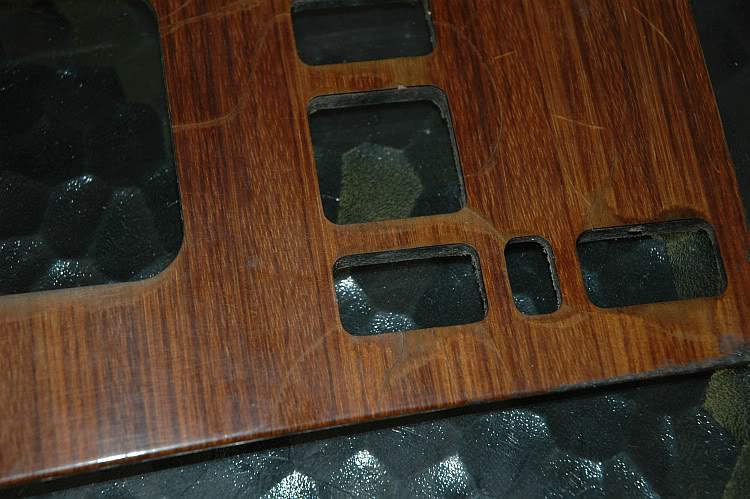 [/align][align=center][/align][align=left][/align][align=left]As this is a very thin zebrano wood veneer, I have read that sanding is NOT a good way to remove the old, cracked,worn out finish. You would run the risk of sanding through the veneer, or having strands of this unique wood grain peeling up. Instead, I made a trip to ACEHardware, and will be using a chemical semi-paste stripper (applied with a brush, wearing solvent-resistant gloves), plastic putty knife, denatured alcohol and rags. To refinish the pieces, I chose a minwax stain, and a thick, self-leveling pour-on high gloss finish.[/align][align=center][b][color=#cc0000][size
[/align][align=center][/align][align=center][/align][align=left]II) Prepped the panel prior to start of refinishing (10-15 minutes):[/align][align=left]After removing, I detached the plastic on the bottom of the panel which the switches all snap into, the two plastic tabs which hold the panel down, and the trim for the gear shift area. This is delicate work! The panel I am working on is 20 years old, and the plastic is somewhat brittle.[/align][align=left][/align][align=left]1) Removed the "plastic switch plate" by using two tiny jewelers flathead screwdrivers, and very delicately prying upunder the CENTER of each staple to slowly free it from the panel. Mine has several cracked areas (but seems to be complete and intact, whew!). I will epoxy this plate later where it has cracked to strengthen it for switch re-installation. I am hoping to re-install this piece later using the exsisting staples and staple holes as a guide, and using epoxy to attach it.[/align][align=left][/align][align=center]PLASTIC SWITCH PLATE, UPON REMOVAL:[/align][align=center][/align][align=center][/align][align=center][/align][align=center][/align][align=left][/align][align=left]2) Removed the plastic tabs which hold the panel down in the car by lightly wiggling them and pulling gently. Again, I will be using the existing staples and staple holes to guide them back into position upon re-installation, using epoxy to attach them.[/align][align=left][/align][align=left]3) Removed the shifter area trim, by very lightly working at the edge (at as flat an angleas possible all along the underside edge of thetrim with a tiny jewelers flathead screwdriver), and very lightly prying up to free it. This was so brittle that a small piece broke off, and it is cracked and separating in places. I will have to either find anew one, orepoxy this one back together.[/align][align=left][/align][align=center]SHIFTER AREA TRIM, UPON REMOVAL:[/align][align=center][/align][align=center][/align][align=center]CONSOLE PANEL, PREPPED FOR START OF REFINISHING:[/align][align=center][/align][align=center][/align][align=center][/align][align=center][/align][align=center][/align][align=center][/align][align=center][/align][align=center][/align][align=center][/align][align=center][/align][align=left][/align][align=left]As this is a very thin zebrano wood veneer, I have read that sanding is NOT a good way to remove the old, cracked,worn out finish. You would run the risk of sanding through the veneer, or having strands of this unique wood grain peeling up. Instead, I made a trip to ACEHardware, and will be using a chemical semi-paste stripper (applied with a brush, wearing solvent-resistant gloves), plastic putty knife, denatured alcohol and rags. To refinish the pieces, I chose a minwax stain, and a thick, self-leveling pour-on high gloss finish.[/align][align=center][b][color=#cc0000][size
#2
02-15-2008, 06:04 PM
I've got a few hours today, so I've decided to start stripping the console wood. I've set up a work area, and have my stripper poured into a metal pie pan, and necessary supplies at hand (brush, putty knife, denatured alcohol, rags, and most importantly, solvent-resistant gloves).
[align=center]STRIPPING AREA SET-UP:[/align][align=center]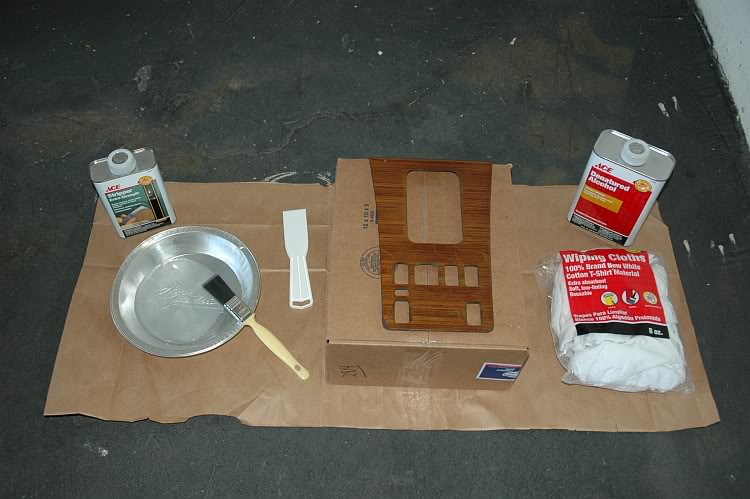 [/align][align=center][/align][align=left][/align][align=left]Now, wearing my solvent resistant gloves, I will apply the semi-paste stripper.I liberallybrush the stripperacross the surface of the wood,left to right, with the grain. The stripper is designed to remove finish and stain, but not damage the wood.[/align][align=left][/align][align=center]APPLYING STRIPPER:[/align][align=center]
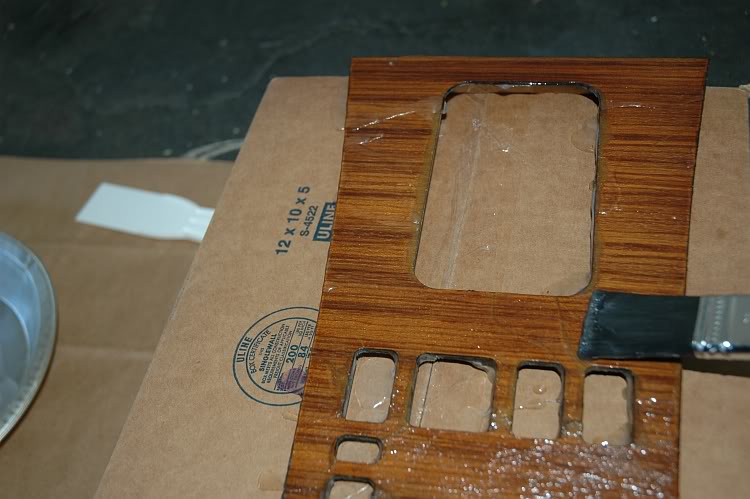 [/align][align=center][/align][align=center][/align][align=left]Having completed applying asatisfactory coat of stripper, I will wait and let it work on the clearcoat. The can says to let it sit about 15 minutes, and then test scrape a small area to see if it has released. Multiple coats may be required for stubborn finishes, and a tootbrush or wood pick may help get finish out of tight places.[/align][align=left][/align][align=center]FIRST COAT OF STRIPPER APPLIED:[/align][align=center]
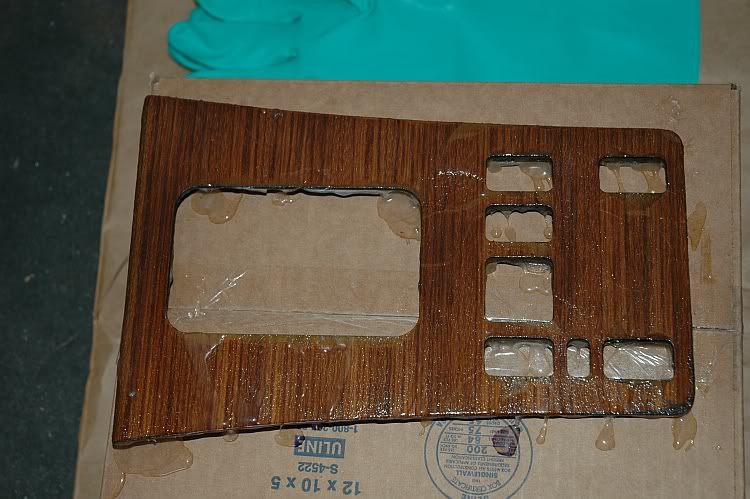 [/align][align=center][/align][align=left]After 15 minutes, I test scrape a small area, and it is not coming off as of yet. I apply a second coat. 15 minutes later, still no change, so I apply a third coat. This time, I let the stripper work for 45 minutes. Scraping lightly now, it seems that the finish is softening just a tiny bit, and so I apply a fourth coat.I now come to the realization that the scraper I have is plastic, and looking at it, I realize that the stripper is starting to eat the scraper! I leave the piece alone again for an hour and 15 minutes this time, and go and get a metal putty knife ready. Two and a half hours have now passed since I initially applied the stripper, and only minimal amounts of the finish are releasing.[/align][align=left][/align][align=center]AFTER 2 1/2 HOURS:[/align][align=center]
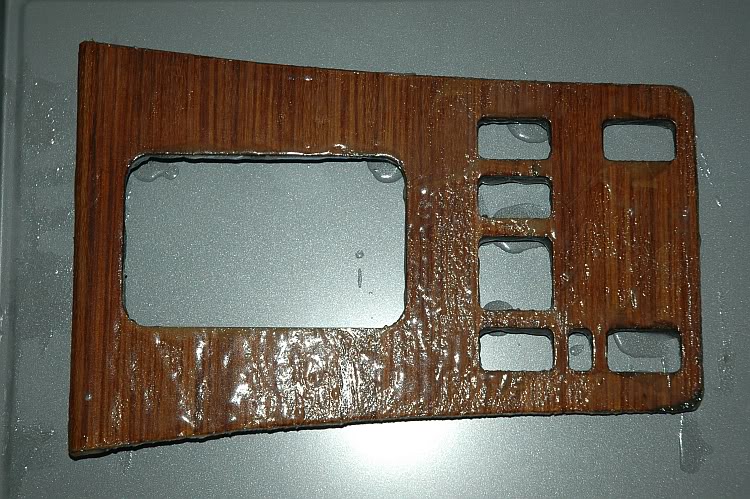 [/align][align=center][/align][align=left]I decide to rinse the wood with the denatured alcohol, which will dissolve the stripper. Wiping off all the stripper with the alcohol and rags, I see that not much progress has been made. I re-apply another coat of the stripper, and let it work for another hour. At this point, upon scraping, some of the edges of the finish have started to break free, but the finish is nowhere near as gone as I had hoped! I give the wood another alcoholrinse and wipedown, and inspect the piece after the alcohol has dried.[/align][align=left][/align][align=center]AFTER 3 1/2 HOURS, AND ALCOHOL WIPEDOWN:[/align][align=center]
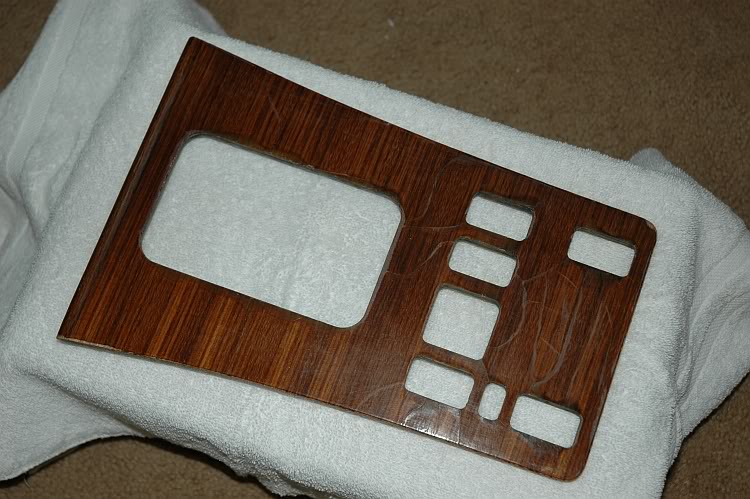 [/align][align=center][/align][align=center]
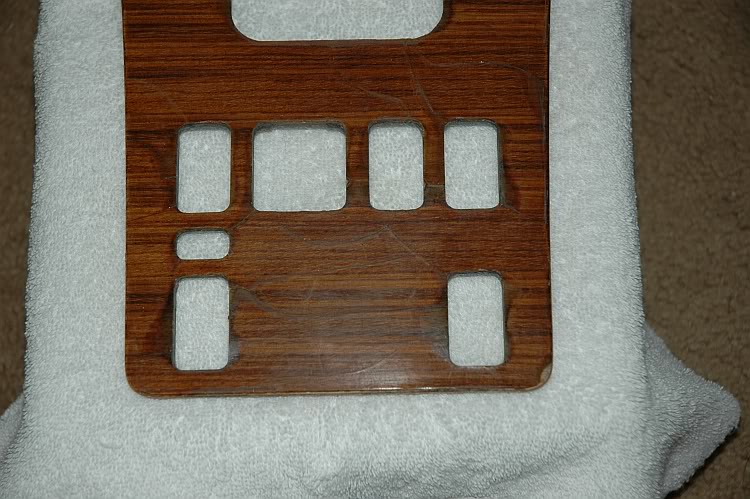 [/align][align=center][/align][align=center]
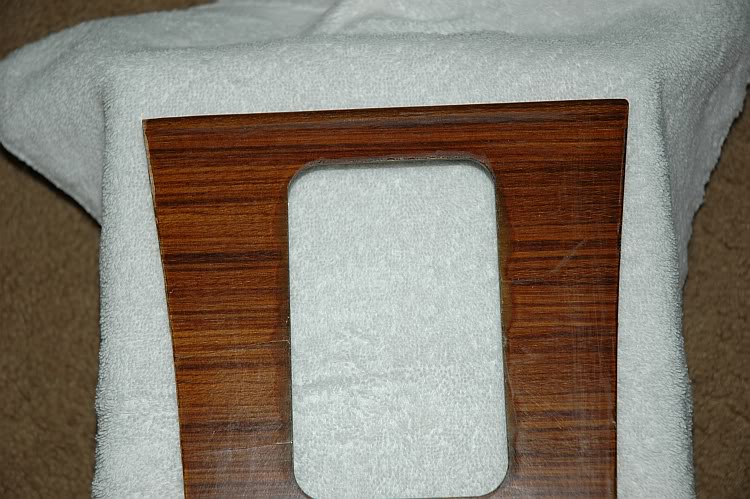 [/align][align=center][/align][align=left]As seen in the photos, only the top left corner and bottom right corner show much difference. I am out of time for today, and I am going to think about trying a different type of stripping product for the next attempt. [sm=smiley29.gif][/align][align=center][/align]
[align=center]STRIPPING AREA SET-UP:[/align][align=center]
[/align][align=center][/align][align=left][/align][align=left]Now, wearing my solvent resistant gloves, I will apply the semi-paste stripper.I liberallybrush the stripperacross the surface of the wood,left to right, with the grain. The stripper is designed to remove finish and stain, but not damage the wood.[/align][align=left][/align][align=center]APPLYING STRIPPER:[/align][align=center][/align][align=center][/align][align=center][/align][align=left]Having completed applying asatisfactory coat of stripper, I will wait and let it work on the clearcoat. The can says to let it sit about 15 minutes, and then test scrape a small area to see if it has released. Multiple coats may be required for stubborn finishes, and a tootbrush or wood pick may help get finish out of tight places.[/align][align=left][/align][align=center]FIRST COAT OF STRIPPER APPLIED:[/align][align=center][/align][align=center][/align][align=left]After 15 minutes, I test scrape a small area, and it is not coming off as of yet. I apply a second coat. 15 minutes later, still no change, so I apply a third coat. This time, I let the stripper work for 45 minutes. Scraping lightly now, it seems that the finish is softening just a tiny bit, and so I apply a fourth coat.I now come to the realization that the scraper I have is plastic, and looking at it, I realize that the stripper is starting to eat the scraper! I leave the piece alone again for an hour and 15 minutes this time, and go and get a metal putty knife ready. Two and a half hours have now passed since I initially applied the stripper, and only minimal amounts of the finish are releasing.[/align][align=left][/align][align=center]AFTER 2 1/2 HOURS:[/align][align=center][/align][align=center][/align][align=left]I decide to rinse the wood with the denatured alcohol, which will dissolve the stripper. Wiping off all the stripper with the alcohol and rags, I see that not much progress has been made. I re-apply another coat of the stripper, and let it work for another hour. At this point, upon scraping, some of the edges of the finish have started to break free, but the finish is nowhere near as gone as I had hoped! I give the wood another alcoholrinse and wipedown, and inspect the piece after the alcohol has dried.[/align][align=left][/align][align=center]AFTER 3 1/2 HOURS, AND ALCOHOL WIPEDOWN:[/align][align=center][/align][align=center][/align][align=center][/align][align=center][/align][align=center][/align][align=center][/align][align=left]As seen in the photos, only the top left corner and bottom right corner show much difference. I am out of time for today, and I am going to think about trying a different type of stripping product for the next attempt. [sm=smiley29.gif][/align][align=center][/align]

#4
03-05-2008, 05:09 PM

Yup, same problem.[:@] Not sure what the coating is, but it's durable. Tried several strippers to no avail. Anybody out there have luck with anything? I'm trying to refinish my Zebrano in 380SL. Same problems, finish cracked and discolored but basically intact.
#5
09-26-2013, 10:43 PM

The finish coating on older MB woodwork is Polyester and it laughs at conventional methylene chloride based strippers. Save yourself some grief and go to a junkyard and pull replacement parts in good shape. They are still out there.
#6
11-10-2013, 04:34 AM

This project of interior wood refinishing is tough enough as there is big risk involve in sanding the wood veneer and upper layer can be damaged if you don't have expertise.
#7
11-11-2013, 10:15 AM
Some years ago I owned/operated a wood refinishing firm and had the occasion to deal with interior woodwork from both Mercedes and Rolls Royce vehicles. The woodwork was finished at the factory with polyester as it is extremely durable (to a point) and "fills" wood pores and cures in a nice flat level surface. It does crack however and in particular if exposed long enough to high temps and sunshine. The wood veneer tries to expand and the polyester finish doesn't, thus splitting the finish in time. As for stripping the finish off, conventional methylene chloride based removers don't work and sanding the finish off is definitely not an option. Furthermore one will be hard pressed to produce an acceptable refinishing job using lacquer or polyurethane.
#8
07-02-2014, 05:21 PM

It may have been my machine but I didn't see how this project ended. My '87 420SEL is undergoing the same surgery. Your advice was invaluable. My (hardware bought) poly stripper wasn't very strong and it took many coats of carefully placed project just on the areas that were not releasing from the veneer worked. It lifted off the sides first then after many coats and varying times of leaving it on the finish was success achieved. Once I got to bare wood, sanded (carefully) smooth, cleaned carefully, stained with a wipe on product. Let everything sit between steps. Then multiple steps with a spray clear coat. Sanding between every three coats with first 400 grit, then 1000+ (polishing more than anything).
Once done, I had to epoxy the plastic template to the wood backplate as the tiny staples too hard to removed and reuse. Two of the window switches had to be glued back as clips broke.
Used MB parts place locally got me the switches, 2 for $20. You can't buy the wood veneer piece anymore, was over $800 I am told when it was. Fun project.

Thread
Thread Starter
Forum
Replies
Last Post
PelicanParts.com
Vendors Special Buys
0
04-16-2013 12:19 PM
PelicanParts.com
Vendors Special Buys
0
04-10-2013 03:36 PM
glovesave33
Private 'Wanted' Classifieds
1
03-16-2008 01:57 AM